Are you tired of visiting nail salons only to watch your beautifully polished nails chip away within days? If so, it might be time to explore the world of nail glue gel kits. These handy tools not only provide a professional finish but also offer the convenience of at-home application.
With just a little practice, you can achieve stunning results that last. Whether you’re looking for durability in your manicure or simply want to elevate your DIY nail game, this guide will walk you through everything you need to know about nail glue gel kits. Keep reading to unlock the secrets behind flawless fingers!
What is a Nail Glue Gel Kit?
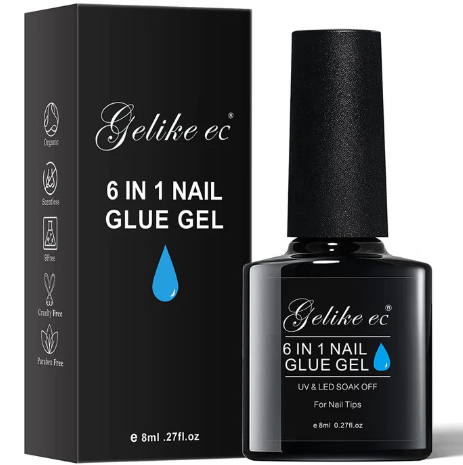
A nail glue gel kit is a complete package designed for at-home manicure enthusiasts. It typically includes essential components like nail glue, gel polish, and sometimes even tools for application.
The highlight of these kits is the adhesive formula that bonds artificial nails to your natural ones. This creates a strong and durable hold, ideal for those who want their manicures to last longer than traditional polish can manage.
Many kits also come with UV or LED lamps to cure the gel quickly. This means you spend less time waiting around and more time flaunting your fabulous new look.
With options ranging from simple press-on sets to elaborate designs, there’s something for everyone in the world of nail glue gel kits. They cater to both beginners looking to experiment and experienced users seeking professional results without stepping out of their homes.
Benefits of Using a Nail Glue Gel Kit
Nail glue gel kits offer incredible convenience for at-home nail enthusiasts. They provide a quick and easy solution for beautiful nails without the need for salon visits. With just a few simple steps, you can achieve professional-looking results.
One of the standout benefits is their durability. These kits are designed to create strong bonds, ensuring your nails stay intact longer than traditional methods. You won’t have to worry about chips or breaks ruining your look after just a few days.
Another advantage is versatility. Nail glue gel kits cater to various styles and preferences, whether you want classic acrylics or trendy designs. Plus, they often come with everything you need in one package – no extra trips to craft stores required.
Using these kits can be more cost-effective over time compared to regular salon appointments. Enjoy stunning nails while saving money!
How to Choose the Right Nail Glue Gel Kit for You
Choosing the right nail glue gel kit can be a game changer for your at-home manicure experience. Start by assessing your needs. Are you looking for something quick and easy or do you want full control over the application process?
Check for different formulas available in kits. Some are designed specifically for beginners, while others cater to advanced users who prefer customization.
Consider the type of nails you’re working with as well. If you have sensitive skin, opt for hypoallergenic options that minimize irritation. Don’t forget about curing times too! Kits vary in how quickly they set, so think about your schedule when making a selection.
Read reviews from real users. Their experiences can provide insights into which products deliver on their promises and help avoid potential pitfalls.
Step-by-Step Guide to Applying a Nail Glue Gel Kit
Start by prepping your nails. Clean and buff the surface gently to ensure proper adhesion. Next, choose the correct nail size from the kit. Each should fit snugly against your natural nail without overlapping onto the skin.
Apply a thin layer of base gel on your natural nail. Use a brush for even coverage, ensuring no excess product pools at the cuticle area. Now comes the fun part—apply a drop of glue gel to both your natural nail and the false tip before pressing them together firmly for about 10 seconds.
Once you’ve attached all tips, cure them under an LED lamp according to manufacturer instructions. This usually takes around 30-60 seconds per hand. After curing, file any uneven edges and shape as desired. Finish with a top coat for extra shine and durability!
Tips and Tricks for Long-lasting Results
To achieve long-lasting results with your nail glue gel kit, start by preparing your nails thoroughly. Remove any old polish, and gently buff the surface to create a smooth base. Cleanse your nails to eliminate oils and impurities.
When applying the gel, use thin layers. Thick applications can lead to bubbling or lifting. Cure each layer under the UV/LED lamp for the recommended time for optimal adhesion.
After application, avoid water exposure for at least 24 hours. This helps prevent premature lifting and ensures the bond remains strong. Regular maintenance is key too. Apply cuticle oil daily to keep your nails hydrated and reduce brittleness that could lead to breakage.
Handle tasks with care—wear gloves while cleaning or doing dishes—to protect your beautiful manicure from wear and tear over time.
Common Mistakes When Using Nail Glue Gel Kits and How to Avoid Them
Using a nail glue gel kit can be simple, but mistakes often happen. One common error is applying too much product. This can lead to excess overflow and messy results. Always start with a small amount and add more as needed.
Another mistake is neglecting proper nail preparation. Failing to clean and buff your nails creates an uneven surface for adhesion. Take the time to prep; it makes all the difference.
Also, don’t rush the curing process under UV light. Each layer needs sufficient time to cure fully, or you’ll risk lifting later on.
Skipping aftercare can shorten the lifespan of your nails. Apply cuticle oil regularly to keep them hydrated and healthy between applications. Small adjustments lead to stunning results!
Removing and Maintaining Your Nails with a Glue Gel Kit
Removing your nails safely is just as crucial as applying them. Start by soaking a cotton ball in acetone, then wrap it around each nail with aluminum foil. This process helps dissolve the glue without damaging your natural nails.
After about 15-20 minutes, gently slide off the gel using an orange stick or a cuticle pusher. Don’t rush; patience is key to avoiding breakage or pain. If any residue remains, soak again for a few more minutes.
Maintenance plays a big role in longevity too. Regularly moisturize your cuticles and hands to keep them healthy and hydrated. Avoid excessive exposure to water right after application, as this can weaken adhesion.
Give your nails some downtime between applications to prevent weakening of the natural nail bed. Treat yourself with nourishing oils during these breaks for optimal health and shine.
Conclusion
When it comes to nail care, a Nail Glue Gel Kit is an excellent investment for anyone looking to achieve salon-quality nails at home. The benefits are plentiful—from durability to ease of use. Choosing the right kit tailored to your needs can enhance your overall experience and satisfaction.
Applying the product correctly ensures that you enjoy beautiful nails for weeks on end. By following a step-by-step guide and utilizing helpful tips, you’ll be well-equipped for success. It’s equally important to be aware of common mistakes that can compromise your results; avoiding these pitfalls will save you time and frustration.
Once you’re ready to remove or maintain your nails, understanding proper techniques will make all the difference in preserving both the health of your natural nails and the longevity of any enhancements you’ve applied.
With this knowledge in hand, you’re set on a path toward achieving stunning nail designs that turn heads while also prioritizing nail health. Happy polishing!