Introduction
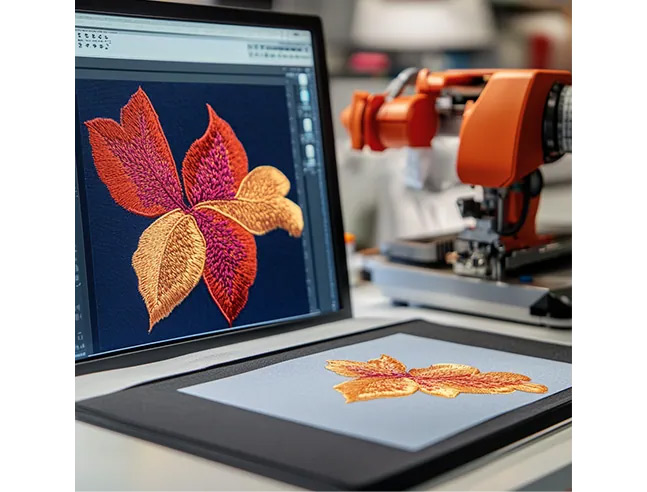
You have the perfect image—a detailed logo, a beloved pet photo, a intricate piece of art. You run it through an automatic online converter, excited to see it stitched out, but the result is a messy, puckered disappointment. What went wrong? The missing link is the human touch of a professional. The journey from a flat pixel-based image to a stunning embroidered piece requires a specialized skill set, and that’s exactly what Digitizers for Embroidery provide.
They are the translators, the engineers, and the artists who bridge the gap between your digital idea and a physical, thread-perfect reality. This isn’t just about converting a file; it’s about crafting an instruction set for your machine that accounts for fabric, thread, and physics.
The Great Misconception: It’s Not Just a “Conversion”
Many people believe that embroidery digitizing is a simple, automated process—like converting a Word document to a PDF. You put a picture in one end, and a stitch file comes out the other. This is the biggest misconception in the craft.
Think of it this way: your JPG or PNG file is like a photograph of a finished cake. It shows you the final look, but it gives you no recipe, no baking instructions, and no list of ingredients. An automatic converter is like a basic algorithm that guesses the recipe. It might get the general shape right, but it will likely miss key steps, leading to a collapsed, unappetizing mess.
A professional digitizer, on the other hand, is a master pastry chef. They look at the photo of the cake and use their expertise to write a detailed, foolproof recipe. They specify the exact ingredients (stitch types), the precise order of operations (stitch sequence), and the perfect baking techniques (compensation for fabric pull). The result is a design that doesn’t just look like the image—it stitches out perfectly, efficiently, and reliably.
Digitizers For Embroidery Toolkit: A Step-by-Step Process
So, what does this “recipe writing” actually involve? Let’s break down the key steps a professional takes that an automated tool simply cannot.
1. Artwork Analysis and Simplification
The first thing a digitizer does is critically analyze your source image. They identify elements that will not translate well to thread. This includes tiny text, subtle gradients, super-fine lines, and complex shadows. They will often simplify the artwork, merging similar shades and removing unnecessary details, to create a clean, stitchable blueprint. This step ensures the design remains legible and attractive when stitched, even at a small size.
2. Stitch Type Selection: The Building Blocks
A digitizer doesn’t just see shapes; they see stitches. They strategically assign one of three primary stitch types to every part of your design:
-
Run Stitches: Used for fine details, outlines, and text. They are a single line of stitching, like a drawn line.
-
Satin Stitches: Used for borders and lettering. They are columns of zig-zag stitches that create a smooth, shiny, and dense finish.
-
Fill Stitches: Used to cover large areas. They are a complex series of running stitches that weave back and forth to fill a shape, often in specific patterns to add texture and interest.
Choosing the right stitch for the right job is fundamental to the design’s durability, appearance, and stitch-out time.
3. Stitch Direction and Push/Pull Compensation
This is one of the most technical and crucial steps. Fabric is not a static canvas; it pushes and pulls as the needle punches hundreds or thousands of holes into it. A circle stitched with all the fill stitches going in the same direction can end up looking like an oval.
A professional digitizer strategically angles the direction of the stitches to counteract this natural fabric distortion. They might stitch one section vertically and an adjacent section horizontally to balance the pull. This foresight is what keeps your designs looking symmetrical and sharp.
4. The Unsung Hero: Underlay Stitches
If you only learn one thing about professional digitizing, it should be the importance of underlay. This is the foundation of your embroidery, and it’s completely invisible in the final product. An automatic converter often skips this or does it poorly. A digitizer meticulously adds a layer of stitching before the top stitches. Underlay has three critical jobs:
-
Stabilization: It anchors the fabric and stabilizer together, preventing the top stitches from sinking into the material.
-
Preventing Puckering: By stabilizing the area first, it minimizes the fabric’s ability to pull and pucker.
-
Creating a Base: It provides a raised, firm base for the top stitches to lie on, which improves the definition and shine of satin stitches and the smoothness of fill stitches.
5. Intelligent Stitch Sequencing and Trims
A digitizer plans the logical order of operations. They group all elements of the same color together to minimize thread changes. They also strategically sequence objects so that larger areas don’t cover smaller, more delicate details. Furthermore, they carefully place trim commands, ensuring the machine only trims the thread when absolutely necessary. Too many trims lead to a messy backside with countless thread ends to deal with; too few can create long, unsightly jump stitches.
6. Testing and Refinement
Finally, a reputable digitizer will often stitch out the design themselves on a similar fabric to what you intend to use. This “sew-out” is the ultimate quality check. They look for any registration issues, puckering, or design flaws and then go back into the digital file to make minute adjustments. This iterative process ensures you receive a file that is proven to work.
Why Invest in a Professional Digitizer?
You might be thinking, “This sounds expensive.” While it is an upfront cost, it saves you money, time, and frustration in the long run.
-
Saves Materials: A poorly digitized design can ruin a garment. A professional file prevents wasting expensive hats, jackets, and shirts.
-
Saves Time: You stitch it once, perfectly. No more un-picking failed attempts or tweaking machine settings.
-
Enhances Quality: The difference in clarity, professionalism, and durability between an auto-digitized and a professionally digitized design is night and day.
-
Solves Problems: A professional can advise on optimal sizing, fabric choices, and how to achieve the best results for your specific project.
Conclusion: It’s an Investment in Perfection
Embroidery digitizing is a unique blend of technical skill and artistic vision. It’s a specialized craft that turns a static image into a dynamic set of instructions that brings thread and fabric to life. While automatic converters offer a tempting shortcut, they lack the critical human judgment required to manage the physical realities of embroidery. By investing in skilled Digitizers for Embroidery, you aren’t just buying a file; you’re investing in a guarantee. You are ensuring that your vision transitions from a pixel on a screen to a perfect, tangible piece of art that you can be proud to wear, display, or sell.


