Accurate moisture measurement, calibration is the cornerstone of reliability. Whether you’re assessing the moisture content of wood, concrete, soil, or agricultural products, your readings are only as trustworthy as your meter’s calibration.
A properly calibrated moisture meter ensures consistency, accuracy, and confidence in every reading. In this guide, we’ll walk through why calibration matters, how it’s done, and the best practices to keep your meter in top condition for dependable results.
Why Moisture Meter Calibration Matters
A moisture meter is a precision instrument designed to measure the water content in various materials. Over time, its sensors, electrodes, and internal electronics can drift out of alignment due to wear, environmental exposure, and regular use.
When this happens, the readings become less accurate, sometimes only slightly, but enough to lead to costly mistakes in industries like woodworking, flooring installation, construction, or agriculture.
For example:
A woodworker might reject perfectly dry boards because their meter reads high.
A flooring contractor could install hardwood over concrete that’s still too wet, leading to warping and adhesive failure.
A farmer might misjudge crop dryness, resulting in spoilage during storage.
Calibration restores the instrument to a known reference standard so it measures moisture content accurately. Think of it as “resetting” your meter’s accuracy to ensure your data remains reliable.
Types of Moisture Meter Calibration
Not all moisture meters are calibrated the same way. The method depends on the type of meter you use and its intended material. The two most common meter types — pin-type and pinless (non-invasive) — have different calibration processes.
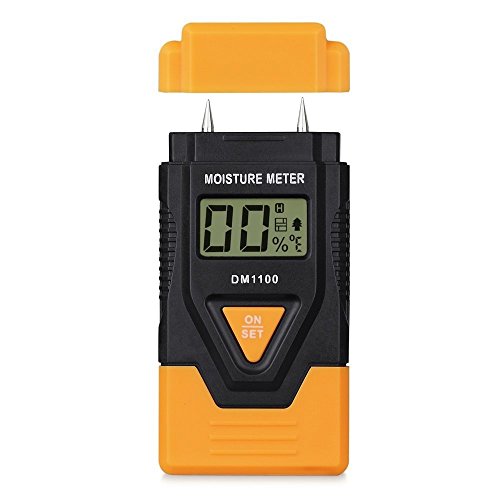
1. Pin-Type Meters
Pin-type meters measure electrical resistance between two or more sharp probes inserted into the material. Because water conducts electricity, higher moisture content results in lower resistance. These meters often need to be calibrated against standard resistive materials or manufacturer-provided reference blocks.
2. Pinless (Dielectric) Meters
Pinless meters measure moisture through an electromagnetic field. They’re typically calibrated to a specific material density. Calibration for these models often involves using a factory reference plate or internal digital calibration check.
Understanding your meter’s type and manufacturer guidelines is essential before you begin calibration.
Step-by-Step Guide: How to Calibrate a Moisture Meter
The calibration process varies slightly by brand and model, but the general principles are the same. Below are the key steps to properly calibrate most meters.
Step 1: Review the Manufacturer’s Instructions
Always start with the user manual. Each manufacturer designs meters with unique calibration points, reference blocks, and adjustment methods. Some models allow manual calibration, while others perform self-calibration digitally.
Ignoring the manufacturer’s specifications can lead to improper calibration, making your readings even less reliable.
Step 2: Inspect and Clean the Meter
Before calibration, make sure your meter and its probes are clean and in good condition.
For pin-type meters, check that the pins are not bent, corroded, or dull. Clean them with a soft cloth or fine sandpaper if necessary.
For pinless meters, wipe the sensor plate to remove dust or residue that might affect electromagnetic readings.
Even small debris or corrosion can cause significant errors during calibration.
Step 3: Stabilize the Environment
Calibration should take place under stable temperature and humidity conditions. Extreme variations can affect both the meter’s internal electronics and the material being measured. Most manufacturers recommend calibrating at room temperature (around 68°F to 77°F or 20°C to 25°C).
If you’re calibrating a meter used for materials like wood, ensure the reference blocks or samples are also at equilibrium with the environment.
Step 4: Use the Calibration Check Device or Reference Block
Many high-quality meters come with a calibration check device, sometimes called a reference block or calibration plate. These are standardized materials that simulate specific moisture readings.
Pin-Type Meters: Insert the pins into the designated holes on the reference block. The meter should display a pre-determined reading (often listed on the block or in the manual).
Pinless Meters: Place the meter’s sensor plate firmly against the reference block. The reading should fall within a specified range.
If the reading deviates from the expected value, proceed to the next step to adjust the calibration.
Step 5: Adjust the Calibration (if applicable)
Depending on your meter type, you may have:
A manual adjustment dial or screw for fine-tuning.
A digital calibration function accessible through the settings menu.
Adjust the calibration until the meter displays the correct reading that matches the reference standard. This step ensures the meter’s internal circuitry aligns with the reference values.
Some advanced digital meters automatically recalibrate when they detect a deviation, but manual verification is still a good practice.
Step 6: Verify and Document Results
After calibration, test the meter again using the same reference block to confirm consistency. Record the date, meter model, reference reading, and any adjustments made. Maintaining a calibration log helps you track performance over time and can serve as proof of accuracy for clients, inspectors, or quality assurance teams.
Calibration Frequency: How Often Should You Calibrate?
Calibration frequency depends on how often and where you use your meter. As a general rule:
Frequent users (daily or industrial use): Calibrate monthly or before each major project.
Occasional users: Calibrate every 3–6 months.
New meters: Always check calibration before first use.
Additionally, recalibrate any time your meter is dropped, exposed to extreme conditions, or starts producing readings that seem inconsistent.
Many professionals perform a quick calibration check at the start of every workday, even if a full calibration isn’t necessary.
Troubleshooting Calibration Issues
Sometimes, a meter refuses to calibrate correctly. Here are common causes and solutions:
| Problem | Possible Cause | Solution |
| Readings don’t match reference block | Dirty or damaged probes | Clean or replace pins/sensor plate |
| Fluctuating readings | Unstable temperature or humidity | Move to a controlled environment |
| Inability to adjust calibration | Internal circuit fault | Contact manufacturer for service |
| Inconsistent readings between materials | Wrong material setting selected | Verify correct mode or calibration curve |
If none of these resolve the issue, the meter may need factory recalibration or professional servicing.
Tips for Maintaining Calibration Accuracy
Store properly: Keep your meter in a protective case, away from extreme heat or moisture.
Handle with care: Avoid dropping or pressing too hard on sensor plates.
Use original accessories: Always use manufacturer-approved reference blocks.
Avoid measuring wet or contaminated surfaces: Excessive moisture or chemicals can affect sensors.
Update firmware: For digital models, ensure the software is up-to-date to maintain compatibility with calibration standards.
Following these maintenance habits will help preserve your meter’s accuracy between calibration sessions.
When to Seek Professional Calibration
If you rely on your moisture for regulated or high-stakes applications, such as building inspections, agricultural exports, or manufacturing quality control, it’s wise to have it professionally calibrated annually. Manufacturers and accredited calibration labs use precision instruments and certified reference materials that meet ISO or ASTM standards, guaranteeing traceability and accuracy.
Professional calibration also includes performance testing, sensor verification, and documentation that certifies the instrument’s reliability.
Final Thoughts
Calibration is not just a maintenance step — it’s a safeguard for accuracy, quality, and trust. Whether you’re measuring wood, concrete, or grain, an uncalibrated moisture meter can turn small measurement errors into big, costly problems. By following a consistent calibration routine, verifying results, and documenting your process, you ensure that your moisture readings are always reliable.
Taking a few minutes to calibrate your meter regularly can save hours of rework, prevent product loss, and uphold your professional credibility. In short, accurate calibration equals reliable results.