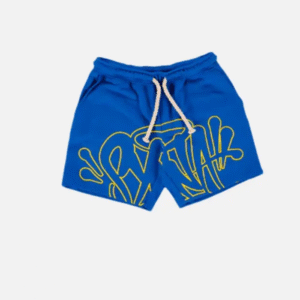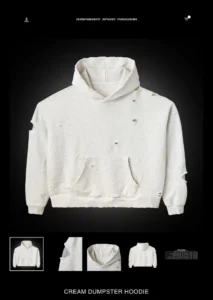
Creating a custom Corteiz hoodie at home is an exciting and rewarding project that allows you to express your unique style. Whether you want to create a streetwear masterpiece or a one-of-a-kind fashion statement, this guide will take you through all the steps to successfully DIY your own Corteiz with professional-level results.
Materials You Will Need
Before starting your project, make sure you gather all the essential materials:
- A blank hoodie (preferably in a high-quality cotton blend for best results)
- Fabric paint or fabric markers (for designing and adding patterns)
- Printable heat transfer paper (if using digital designs)
- Iron or heat press machine
- Fabric glue and embroidery threads (for additional detailing)
- Scissors and a craft knife
- Stencil sheets or masking tape (for neat design application)
- Acrylic sealer spray (to protect the final design)
Step-by-Step Guide to DIY Your Corteiz Hoodie
Step 1: Choose Your Hoodie
The base of your project is selecting the right hoodie. Opt for a high-quality hoodie that will hold up to customization and washing. Corteiz hoodies are known for their durability, so choosing a thick cotton fleece material will give you a similar premium look and feel.
Step 2: Design Your Concept
Plan your design before making any modifications. Consider:
- Graphics and typography – Choose a signature font or hand-drawn lettering.
- Logos and symbols – Incorporate elements inspired by Corteiz streetwear culture.
- Color themes – Stick to a bold, urban aesthetic for an authentic look.
- Personal elements – Make it unique by adding your initials or artwork.
Step 3: Preparing the Hoodie
Before painting or applying any design:
- Wash and dry the hoodie to remove any coatings that may prevent proper adhesion.
- Iron the fabric to ensure a smooth surface for customization.
- Place a cardboard insert inside the hoodie to prevent paint from bleeding through.
Step 4: Applying the Design
There are multiple ways to customize your hoodie depending on your preferred method:
Using Fabric Paint or Markers
- Outline your design using a stencil or freehand sketch.
- Apply fabric paint in layers to prevent smudging.
- Allow each layer to dry before adding details.
- Set the paint with heat using an iron (as per paint instructions).
Using Heat Transfer Paper
- Print your design onto heat transfer paper.
- Cut out the design carefully.
- Place the paper on the hoodie, aligning it perfectly.
- Apply heat using an iron or heat press for the required duration.
- Peel off the backing carefully, revealing the transferred design.
Embroidery for a Premium Touch
- Trace your design lightly on the fabric with a pencil.
- Use embroidery floss to stitch outlines or details.
- Secure the threads with knots to prevent unraveling.
Step 5: Add Special Effects
To make your DIY Corteiz hoodie stand out even more, consider adding:
- Distressed effects by lightly sanding specific areas.
- Glow-in-the-dark elements for a unique nighttime look.
- Puff paint for a raised, 3D effect.
- Metallic accents for a premium streetwear feel.
Step 6: Seal and Protect the Design
Once your design is complete, ensure it lasts long by:
- Applying an acrylic sealer spray to lock in paint.
- Ironing over the design with parchment paper to enhance durability.
- Washing the hoodie inside out in cold water to prevent fading.
Styling Your Custom Corteiz Hoodie
Now that you’ve successfully customized your hoodie, pair it with:
- Baggy cargo pants for an urban streetwear look.
- Layered chains and accessories to elevate your outfit.
- Chunky sneakers or high-tops for a complete streetwear aesthetic.
- A crossbody bag or tote to complement your DIY masterpiece.
Final Thoughts
DIY-ing your own custom Corteiz hoodie allows you to express creativity while achieving a professional, high-end look. By following this guide, you can create a hoodie that stands out and showcases your personal style. Get started today and wear your art with confidence!


